Saturday, March 2, 2013

Topping up and Tasting

After doing A LOT of reading about Brettanomyces and wild ales in general, I came across an article explaining that it is best to ferment/age your sour beers in Glass. I always thought this was just because of the risk of infecting plastic equiptment, and maybe a bit of a risk of oxidation but I wasn't really too concerned about that.

The information I found explained how plastic is much more porous then glass, and therefore lets in alot more oxygen which leads to stale/cardboardy flavors, or even infections. I was aware of this as well, but was not too worried because of the protective pellicle that usually forms from Brettanomyces. However I also read that oxygen is able to slowly enter through the pores of the plastic directly into the beer underneath the pellicle.

When exposed to oxygen, Lactobacillus and Pediococcus both produce alot of lactic acid which can lead to a potentially un-drinkable beer. But an even bigger problem to avoid is Acetobacter. Acetobacter is a bacteria that has the ability to convert Ethanol into Acetic Acid, or Vinegar. Acetobacter is a big enough issue for me to want to avoid it at all costs. I normally ferment my Lambics/Infected Ales in a plastic bucket and then transfer to a Glass Carboy along with all the yeast/bugs for secondary. For whatever reason, I ended up putting a batch of Lambic in a plastic carboy for Secondary just a month or two ago, So I Figured I should attack the problem before it happens.

 Thursday I had 3 batches of Lambic, Today I have 2, 5 gallon carboys topped up all the way.

Batch 1: OG 1.032, Outlined the process in past blog post. Lambic Brewday

Batch 2: OG 1.058

Batch 3: OG 1.043
 
After taking samples and setting them aside I went ahead with transferring. Batch 1 was in glass, but needed topped up. I blended 3.5gal of Batch 1, and 1.5gal of Batch 2 for an effective OG of 1.040.
 
I then Blended 2.4gal of Batch 2 and 2.6gal of Batch 3 for an effective OG of 1.050. Now my lambics are all nice and topped up and im done messing with them for 3 years, and done brewing more until next Winter. Tasting notes of the 3 samples below.
 
One thing I think I should note about transferring lambics, is that when your siphoning you should gently rouse up the yeast cake so that alot of it gets transferred with the beer. All these yeasts and bugs still have a lot of work to do before all is said and done.
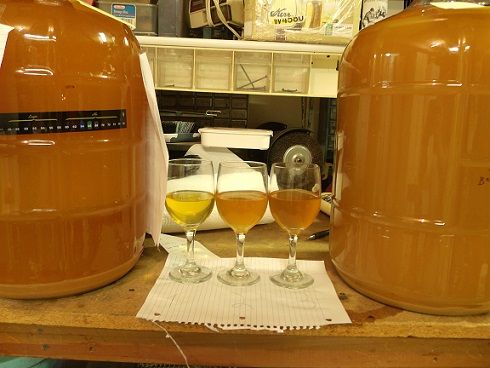


Batch 1  

Appearence: Very clear, some small particles floating around. Bright Golden Yellow Color, Very Pale
 
                Aroma: Funk, Acid, Tangy Orange juice/Fruit, Has alot in common with commercial examples.
 
                Taste: Cheesy aged hops, some bitterness, No Sourness or Acidity at all, a bit surprising considering the aroma.
 
                Mouthfeel: Sticky and Dry


Batch 2
 
   Appearence: Murky Orange/Yellow color, Darkens to sort of a Brown/Golden color at the edges
            
Aroma: Pretty similar to Batch 1, but has alot more Citrus/Spice character
            
 Taste: Watered down Orange Juice, Very bland flavor profile but has a bit of Acid

              Mouthfeel: Sticky and Dry like the First


Batch 3  
 

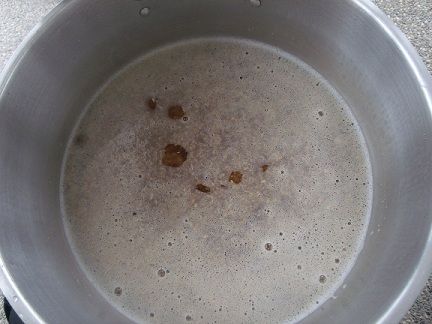
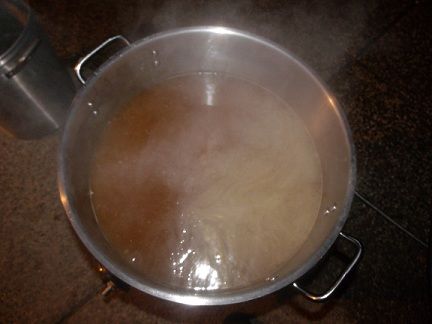
This batch is the only one I cooled naturally. After brewing I ran off the wort into a sanitized kettle, and left it outside, uncovered for about 7 hours to cool. It was in the High 30Fs - Low 40Fs in my area. 
 

              Appearence: Looks a lot like Batch 2, but it is a bit darker for now. I think once it ferments out more it will lighten up.

              Aroma: Orange Fruit, Strong Herbal/Mint Aroma. Strikes me as odd, and the only answer I can come up with is there is something Local that got in there while cooling. I honestly am not sure. Guess I'll just have to wait and see what happens.

               Taste: Much more acid, strong lemon juice flavor and some aged hops. The higher level of acid I think has to do with the fact that I used yeast and a small amount of fermenting wort from Batch 2. Either that or the fact I used Barrel Chunks from Russian River for the oak Portion, Which has some strong strains of Lacto and Pedio, but still it developed acid quite quickly so Im not sure.

              Mouthfeel: Same as the others, maybe a bit creamier
 
After tasting these batches I am highly encouraged to continue the experiment. The flavor profiles are just what im looking for so far, and I am very impressed with the Consistency. I always use the same %s of Grain for the recipe, but have scaled up and down for efficiency reasons and still they are very consistent. Now to let them do their thing for a while.

Until Next Time. Cheers!

Thursday, January 24, 2013

Brewing with Rye

I have always been a fan of rye as far as beer goes. I really enjoy the spice and rustic flavor that comes from rye, especially in Barleywine, and rye moonshine, if you've never had rye moonshine I suggest you try it. I have never really brewed with rye except in a barleywine recipe I brew every year, so I thought I would brew something a bit lighter that I could be enjoying within the next month or so, so I decided to brew up a Rye Pale Ale.

Basic malt bill of Pale 2 Row, Rye, and Crystal Malts. For hops I decided to go with CTZ (specifically Columbus), Centennial and Simcoe. I thought the dank pine character from Simcoe would go really well with the Rye, and I just enjoy the bitterness that comes from CTZ. I chose to use WY1056 for my yeast strain. Real neutral if you treat it right, and will let my other ingredients be in the front.
 
 
Mash Rest
5 Gallon Batch
All Grain
Est OG: 1.050
Efficiency: 63.6
60 Min Boil
 
Grist
 
60.9%   2 Row Pale (American)
26.1%   Rye Malt
08.7%   Crystal 60
04.3%   Flaked Rye
 
 
Hops
45 minute hop addition
 
.50 oz Centennial   10.4%AA  60min
.50 oz Columbus    13.9%AA  60min
.50 oz Columbus    13.9%AA  45min
.50 oz Simcoe        13.0%AA  15min
.50 oz Centennial   10.4%AA   0min
.50 oz Simcoe        13.0%AA   0min
1.0 oz Centennial        NA         Dry
 
Yeast
 
1 smack pack Wyeast 1056 (American Ale). Was fermenting within 5-6 hours even without a starter!
 
Mash
 
75min Sacch Rest at 151F
10min Mashout at 170F
 
Fly Sparge with about 3.25 gallons water.
 
Can't wait to see how this one turns out. I have a feeling its going to be a go to house recipe!


Barrel Aged Barleywine Tasting Notes


Above I mentioned a barleywine I brew every year, last years batch went into a brand new Hungarian Oak barrel for it's first use. I only "aged" the beer in the barrel for something like 16 days if I remember correctly. But with a brand new barrel that may have been pushing it just a little bit. Let's find out!

Appearence: Deep red with a bright orange background hue, very very clear, nice off white head. Steady co2 bubbles. Nice looking beer.

Aroma: Oak on top of malt. Not much hop presence though there is a bit. Kind of a syrupy oak aroma to it. No alcohol

Taste: Rich malt profile with a bit of oak in the back. When I bottled this it tasted like it was whiskey aged, but the oak has backed off alot, quit nice. Low hop character, its more hop flavor than bitterness. Bit of booze in the end but not too strong

Mouthfeel: Medium bodied, for a 10%ABV barrel aged beer it is pretty thin and easy drinking.

Overall: Very satisfied with this beer. Ive done a ton of beers with oak chip/cubes, barrel staves etc.. But this is my first barrel beer. Very satisfied.

Until next time, Cheers!

Sunday, January 20, 2013

"Spent" Grains

I brewed a Lambic yesterday, and while I was slaving my way through the turbid mash schedule I was trying to decide where I was going to dump these grains. My Grain discard bin is full and green waste doesn't get picked up for another week. What was I to do? Call these grains "spent" and send them on their way down the road to the middle of an empty field? Absolutely not, Lets make some treats for our 4 legged friends, Why not a few loaves of bread while we're at it?

For the dog treats, I have found recipes for friends in the past, so this time around I just found a few different ones and made my own based off of the information I was able to find.


Spent Grain Dog Treats

4 Cups Spent grains (wet)
2 Cups UnBleached All Purpose Flour
2 Eggs
1 Cup All Natural Peanut Butter, My local Supermarket has a little Peanut Butter press in the bulk Section So I got mine there. 100% Peanut Butter

First Step was to mix all the ingredients into a basic dough. Then smush, for lack of a better term, the dough onto the surface of a lightly oiled cookie sheet, you want the layer to be thin, but not so thin it burns right away.
 
 
Next step is to Scour the Dough, You can do shapes, Use a Cookie Cutter, whatever works.


I used simple rectangles so that I could simply crack the pieces apart when the time came. Now bake at 350F for 30 mins to harden up the treats before the next step. Once this 30 mins is up, you can go ahead and crack along your scouring lines to seperate the treats. Be careful though. HOT


Lower the heat on your oven to 225F and continue cooking for about 3-4 hours, or until you are confident there is little to no moisture left in the treats. You want them as dry as possible so they will last a long time. Every dog I have given these to LOVES them. Hopefully your pup does as well.


Spent Grain Bread
 
2.5 Cups UnBleached All Purpose Flour
1.5 Cups All Natural Wheat Flour
2 tsp. Salt
2 tsp. Yeast
3 Cups of Spent Grain (wet)
1/4 Cup Orange Blossom Honey
1/4 EVOO
1 Egg - Beaten before added into the mixture
3/4 Cup of Milk - Maybe up to a cup depending on how wet your grain is
Oats or Flaked Barley (optional)
 
I dried my grains out a bit in the sun just because they had a bit of excess water and such.


First step is to once again make a Dough. Kneading should take about 10 mins by hand, 5 mins if using a Kitchen Aid or something similar. Once your dough is formed, add 2 tsp. of Bakers yeast, I forgot which brand I used but pretty much any Bread yeast should do. Knead for an additional 3 mins or so, then set your dough somewhere nice and warm to Rise. I took mine upstairs and let it hang out for about 90 mins.


After 90 mins you can go ahead and punch down your doughball and seperate your loaves. I had enough to bake a Loaf today, and throw a ball of dough in the freezer for another day. Once you have your loaf spread out in your bread pan, scour the top and you can go ahead and bake it from there, or you can sprinkle some old fashioned oats (or Flaked Barley) over the top for extra flavor and appearence. Other options would be poppy seeds, peppercorns, sunflower seeds, whatever your in the mood for.
 
 
350F for 40 mins.
 
Let cool for 30 mins before slicing

There you have it, a nice rustic looking loaf of Artisan bread :) Hope this post helps somebody out. Thank you for taking the time! Cheers!

Thursday, January 17, 2013

Russian River Consecration Tasting

I apologize in advance for a lack of information. I lost a few sheets of paper involving this brew, so exact numbers of some things are not known. But this was a homebrew kit so it should'nt be too hard to find the information.

Quite a while ago I was browsing online and happened upon Morebeer!'s Webpage. They had an advertisement for a beer kit they had made in Collaboration with Vinnie Cilurzo, the beer was Consecration from Vinnie's Russian River Brewing Co.

The beer is Described as a sour dark ale aged in Cabernet Sauvignon Barrels w/ Black Currants. Having been a fan of Russian River for a while, I decided to buy an All Grain Version of the kit and throw it in one of my Sour Fermenters.

The kit Consisted of the Grist, or Grain bill for the brew. Simple 2 Row Pale base malt, Carafa II and a few other specialty grains/sugars, and a large bag of Dried Black Currants. Sterling and Styrian Goldings for hops, and Wyeast 1214 for Primary Fermentation. Also included in the kit were 4 chunks of oak, cut from Barrels that previously held Russian River's Commercial version of this beer.

For more details go to MoreBeer.com and you can find the directions for brewday.

For Primary ferment I pitched WY1214 and let it ferment out. After about a Month I racked the batch onto the Black Currants and pitched 1 vial of White Labs 645 Brett. Clausenii. Once I achieved the Brett Character I was looking for I added the Oak Chunks, as well as 1 pack each of Wyeast's Pedio and Lacto Cultures. I wish now I would've pitched something like Roselare Ale or some kind of blend, because using the 2 in conjunction with each other did not give the results I was looking for. Last of all I added about half a pack of ENOFERM RP15 for Bottle Conditioning

Tasting Notes:

HOMEBREW

Appearence: Side by side my version is alot darker, but I suspect I swirled up the yeast cake in the commercial version while pouring. No head at all. Lasted about as long as the head on a pepsi. Nice c02 though. Deep deep red color

Aroma: Very faint, fruit leather, can get the lacto and pedio, very light brett funk. Most of the character from the primary yeast is gone, or covered up by the bacteria.

Taste: Raisons and alcohol. Currants definantly come through but in more of a winelike character. If there wasnt all the different flavors from the lacto and pedio, and whatever was living in the wood, this would be pretty boozy

Mouthfeel: Light and refreshing, But I suspect I may have bottled a little early because I get a very very faint pedio sliminess. But I cant pin point if it is Pedio or something else

Overall: Decent but needs more age for sure.

COMMERCIAL

Appearence: More cloudy and quite more red. Small ring of foam floating on top with crazy c02 stirring up the surface. Reddish/Brown Color with an orange hue around the edges

Aroma: Much stronger aroma, Fruit, Oak, Funk. Maybe a bit of Tobacco, but its definantly tropical smelling. Brett is pretty hidden in the back, or it melds so well it goes un noticed.

Taste: SOUR, Wayyy different then my homebrew version. Strong fruit flavors followed by a Bone dry aftertaste of funk. Upon my second sip I get Mushroom notes, Very pronounced fungus like character with a strong acetic acid in the forefront. Amazing beer really. wow

Mouthfeel: Very sweet and Full bodied in the beginning and then fades to a chalk dry finish

Overall: Great beer. Totally Different then I was expecting. Glad I decided to make a trade for this guy :) Would definantly pick it up again


Monday, October 8, 2012

Bottling Chardonnay Blonde Ale 10/05/12

Welcome, to yet another installation of my Brewing blog. I meant to make this post a few days ago, But had some other things to take care of. I am now sitting in front of my laptop, with a 16 oz glass of New Belgiums Shift, rambling on thus wasting more time!
 
So, a While back (August 8th, 2012), I brewed up a pretty basic Blonde ale. Used Pale malt for the Base, backed up with a bit of pilsener to give that nice Belgian/German characteristic to the Blonde ale. In addition to that I used a small quantity of Crystal malts and Torrified wheat, To kind of tweak the color a bit, and hopefully gaining some heading properties from the Torrified wheat.
 
The mash was also very basic. Just a simple Single Infusion mash, Sacchrification rest at 150F for 75mins. At the time I was having small troubles with efficiency so I employed a longer mash rest to make sure I had conversion. This worked. Then I used a basic Fly sparge around 175F, and collected my wort.
 
For the 65min boil, I used a single bittering addition of 1oz. Williamette (5.7%AA) at 65mins.
 
Post Boil I had 5 gallons of wort, OG: 1.054. I cooled the wort and Pitched one vial of WLP001 Cali Ale yeast for primary fermentation.
 
Once Primary was complete I racked the beer onto 5.44 oz of Oak I had soaked in Italian Chardonnay. The oak started out as an Oakboy I purchased from Northern Brewer. I then Sawed the Oakboy into 4 pieces and soaked it in the Chardonnay for somehwere around 2 months. At this time I let fermentation continue for a few days. Then threw it in the Lager fridge, Around 33F, and left it there for 38 days. 
 
On Oct. 5th, Last Friday, I took the fermenter out of the fridge in the morning, and set it out to warm up just a little and get to bottling temp. I used Northern brewers priming calculator for my amount of priming sugar. Andrew Hood from Tallgrass Brewing Co. suggested to use Cane sugar (sucrose), since it is 100% Fermentable and leaves very little residual sweetness once conditioning is complete.
 
2.69 oz of Cane Sugar for 4 gallons
 
Then boiled the sugar with 1 pint of water
 
Boiling priming solution
 
Once the solution was boiled, I cooled it down a bit in the sink, then threw it in the freezer while I made the rest of my preparations. At this time I gathered my Brettanomyces, my auto shiphon and tubing, as well as everything else I would need, and started my siphon. Quickly after I started the siphon I added the priming solution. The beer was amazingly clear.
 
Siphoning Blonde ale, So clear you can see right through it
 
In advance I had decided to bottle some of the beer straight, without Brettanomyces so I could drink some while the Brett bottles were conditioning, as well as taste some of the un soured beer. So I picked up a six pack of 22 oz bottles earlier that day, for this purpose.
 
Six 22 oz Bottles of Chardonnay Blonde Ale
 
That took up about a gallon of beer, and I was left with 3 gallons of beer. I then measured and added my brettanomyces.
 
I used Brett Lambicus from White labs. I had talked with Andrew Hood a week or so before I brewed this up, and He mentioned having success with using 6mls of Brett. Per Gallon. Which was the route I was going to go. However, I was not thinking and Let my Brett Sit out for a few hours before bottling, BAD IDEA. The vial exploded when I opened it, not literally but there was Brettanomyces spewing all over the place (This is the reason I prefer WYEAST to White Labs, Almost always have bad experiences with White Labs) and I ended up with 10mls of Brett Lambicus for 3 gallons of beer. Which is 1ml more then half of what Andrew Suggested. I am pretty bummed with the turnout so far, but who knows, Maybe the amount I added will be enough for my taste. Until then, Who knows.
 
10 mls of Brett Lambicus, Sorry for the blurry photo
 
I added the brett to the 3 gallons of beer, and bottled it up in Cork top Belgian Bottles, 375's and 750's. Plan to age the 750's and drink the 375's once they are ready. I am a huge fan of young Brett Conditioned beers. About a year or so from now I will post some tasting notes for the Brett Bottles. Maybe a review sooner for the Un Soured Bottles.
 
Thank you for taking the time to read this post. I enjoyed the experience, and have learned quite a bit. Hopefully next time my vial will not explode!
 
Thanks to Andrew Hood For all the help with Conditioning with Brett. and Thanks to my Girlfriend for helping me bottle this batch, as well as many others.
 
Until Next Time.
Cheers!


Wednesday, October 3, 2012

Lambic Brewday 10/02/12

Welcome, To my first blog post. As of late, I have been doing a lot of experimenting in my homebrewery, which sparked the thought of starting of my own blog.

Today I brewed my 4th Lambic style beer, Which seems like a great way to start off my blog. All in all the experience was great. Even though I was brewing by myself, and I mashed in at 5:30am, I had alot of fun during the 7.5-8 hours it took to brew.

Below, You will find The processes I used, as well as some photos from the Brewday.

First Off I must note, The Mash schedule I used is a Turbid mash method that I designed based off of a scaled down version of Cantillon's Schedule.

To start, I purchased 1 lb. of 3 year old Tettnang(US) hops from an online source. The cones were nice and aged looking, little bit of yellowing on the cones and a strong, aged, dusty kind of cheese aroma. Have a feeling these hops were exactly what I wanted.

The grist was made up of 6 lbs (66%) Belgian Pilsener Malt, and 3 lbs (33%) Raw, Unmalted wheat.

The initial mash-in took place around 5:30 am on brewday. I started off by Heating 2.5 quarts of water to around 146F, then slowly mixed that into the grain in the mash-tun. With such a thick consistency you have to mix the mash very well at this point, make sure there are no dough balls or clumps of flour in the mash. Below is a photo of my mash thus far in the process. Overall mixing should take about 10 mins, then employ a 15min rest.

Very Thick mash, photo taken just after mash in
 
Next, I brought 3.8 quarts of water to a boil. As soon as my 15min rest was complete, I added the whole 3.8 quarts into the mash, stirring very well to make sure I obtained an even temperature of 136F, which I hit spot on. At this stage the mash will have some excess liquid but not too much, let rest at 136F for 10-12mins. During this rest, I pulled 1.2 Quarts of liquid mash and heated to around 176F. The portion I pulled off of the main mash was very cloudy and thick, milky/dirty looking.
Now is also a good time to start boiling more water. From the Grain/water ratio I calculated that I need to boil about 5.5 quarts water to reach my next Mash Rest.
 
1.2 quarts of liquid mash, run off into kettle #2
 
 Once heated the liquid should clear a bit with bits of hot break forming (Photo below), unfortuantely you cannot see it too well.
 
Clumps of hot break forming around 176F
 
 
Set the pulled portion ^ (above) aside and let it rest.
Over the next 10 mins, add 5.5 quarts of Boiling water to the mash making sure to stir very well. After mixing, the mash should be somewhere in the 148F-153F Range, which will work just fine for our purposes. Boil another 5.5 quarts of water, Let The mash rest for 30mins in this Range.
 
After the 30min Rest, Pull 4 quarts of Liquid from the main mash and add it to Kettle #2, Heat this solution again to make sure you maintain a temperature around 176F.
 
Add the 5.5 quarts of boiling water to the main mash, stirring well. This will bring your mash somewhere between the 159F-162F Range. Once this temperature is acheived let Mash rest for 20-25 mins.
 
After this rest is complete, Run off all the liquid from the main mash into a 3rd kettle, and heat to a boil. Once boiling this solution will be very dark colored with alot of coagulated protein on top (Photo Below)
 
Thin mash once heated to boil.
 
At this point, add all The wort from Kettle #2 (176F), back into the main mash to reach a temperature between 165F-167F. Once this temperature range is reached, Allow mash to rest for another 20-25 mins.
 
During this mash rest would be a good time to start heating your sparge water. Since we are brewing Lambic, We will use sparge water at about 190F. This temperature is not too Normal, Seeing as how Tannins and grain matter are drawn out in this temperature range, However this is exactly what we want for Our Lambic.
 
After our 20-25 minute Rest, It is time to Recirculate the main mash in order to clear it, This will take anywhere between 15-30 mins depending on your system.
 
Recirculating the Lambic Mash
 
 
Once clear, start running off the Wort and Begin sparging. Sparge until your runnings reach 1.008 or Lower, In a sense the more tannins the better, seeing as how the yeast/bacteria strains we are using thrive on grain material, Tannins and proteins.
 
Sparging
 
Once your Wort is collected, It is time to start the boil. Once the Wort starts boiling, add 4oz Aged Hops, In my case 3 year old US Tettnang. Sometimes your wort will end up being 10 gallons at 1.009, or 7 gallons at 1.030, etc.. You never know, So based upon your system, Boil the wort down to anywhere between 1.040-1.054 or higher, or to a final volume of 5 gallons.
 
Beginning of the boil
 
Halfway through the boil
 
 
Personally, I had poor efficiency this day and I wanted to have a full 4 gallons of Lambic for blending. So I ended up with a 90min Boil, and an OG of 1.032. If I would have boiled for 3-4 hours as Suggested, I probably would have been more in the gravity range, but only had about 2-3 gallons of wort. I am comfortable with the outcome seeing as how I plan to blend a Geuze in a few years, So 1.032 OG is fine for a portion of the blend.
 
Prior to Brewing, I boiled 1.30 oz of French oak cubes, replacing the water as needed until there was no visible color being extracted from the wood. I then carefully poured the water down the drain, leaving the oak cubes behind. I was able to dump them directly from the saucepan into my fermenter just before running off the wort.
 
After the boil, Use your method of choice for chilling and/or Innoculation. You can Let the wort Cool Overnight and allow spontaneous fermentation if you feel the need. Personally, I used a wort chiller, and Pitched multiple yeast strains. I cooled the wort to about 80F, Racked it into the fermenter and pitched Wyeast 3278, as well as the dregs from a bottle of Tilquin Geuze, and a bottle of Drie Fonteinen Oude Geuze, Roughly 50mls of Each. I saw signs of Fermentation within 8 hours, though this may take a bit longer.
 
Thank you very much for taking the time to read this post. I very much enjoyed this brewday and
am very happy to have shared it with you all. If you have any feedback or input, feel free to send me an email! - braindeadcraftbrewedales@gmail.com
 
!IMPORTANT! - When using spontaneous fermentation, you should forget everything you have been told about homebrewing, Including the fact that nothing harmful can live in your beer. Great beer can be made with the use of spontaneous fermentation, However, 9 times out of 10 when you spontaneously innoclulate wort, you end with a live culture of E. Coli. DO NOT TASTE your Lambic beers until at least 6 months into the process. But make sure there has been alcohol production before you taste. Alcohol will kill the E. Coli, and at that point there is nothing to worry about. The longer you wait. The better.
 
ISOLATED CULTURES (WYEAST,WHITE LABS) ARE SAFE REGARDLESS